Leaking Overflows
Drip, Drip, Drip!
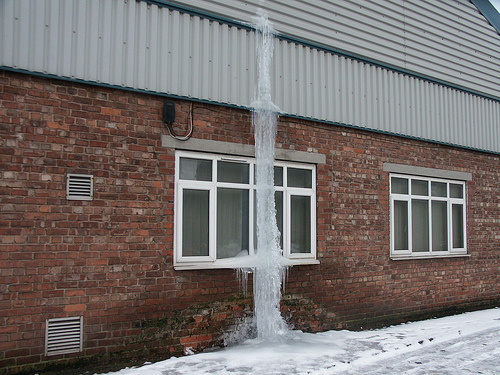
Poking out the wall somewhere you will have pipework leading from your toilets, tanks and possibly your boiler. If the water supply to the asset in question fails to shut off, the overflow pipe, if correctly installed and terminated, will take away the excess water to prevent property damage. Please don't ignore overflow pipes dripping!
Dripping Overflow Frozen |
|---|
For your boiler overflow, commonly called a pressure relief, please call a gas safe registered engineer to take a look if the drip has lasted for more than 24 hours, or is reocurring. For tanks however, you may be able to change the ball valve, or even service the ball valve by changing the washer inside.
Having identified your tank which has too much water in, we can have a go at changing the ball valve. You will need a new ball valve, some water pump pliers to remove and replace the valve, and a fibre washer suitable for joint between the cold water pipe and the ball valve, called a swivel washer.
To change your ball valve in one of your tanks, do as follows;
 |
|---|
- Turn off your mains water stop cock
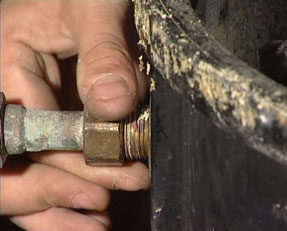
- Undo the nut connecting the supply pipe to the ball valves body.
- There are two big nuts on the ball valve either side of the cistern that hold the ball valve in place. Unscrew the back nut on the outside of the cistern. You can then remove the ball valve from the cistern.
 |
|---|
- Assemble the new ball valve and tighten any loose nuts, also set the arm level at the approximate level of the old ball valve. You may have to bend the arm of the ball valve slightly
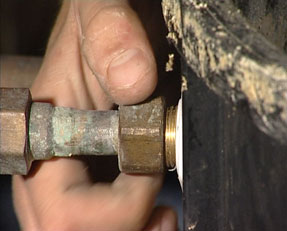
- Put the new ball valve in place and screw on the back nut. Make sure that the ball valve is secure by tightening the back nut with a pair of grips
 |
|---|
- Replace the washer on the nut connection (the nut on the supply pipe) and tighten using a pair of grips. Alternatively, as a temporary jointing method, you can carefully use a couple of wraps of PTFE around the flange of the ball valve connector. This is non preferred to a fibre washer.
- Now, we turn on the water, and test for leaks!
Servicing a Ball Valve
As mentioned, it is possible to change the insides of the ball valve rather than replace. Normally, the washer and seating can be changed and the ball valve will stop dripping. However, the insides of a ball valve can be badly affected by scale, so it may be harder than you think! If you want to have a go, you're not losing anything!
- Ok, turn the water off, pinch the split pin holding the arm flat, and twist/pull it out. (Never replace this with a mild steel split pin, it will rust and you will get a flood) do this with the water level LOW or you will strain the arm crank. The arm/ball will drop free. Shake the ball to check for water inside the ball. ALways replace a ball like for like - if its a copper ball theres a reason for it usualy.
- Now with two sets of grips unscrew the main body of the valve from the carrier section. Be careful, there is a washer and a plastic jet unit.
- Now with the main body free, grip it with a wrench and unscrew the end cap, and shake out the slide. Ok, inspect the arm for cracks and the removed body for excessive wear. Take the brass or plastic slide carridge and inspect the washer, (usualy captive inside the body), if damaged, replace by picking it out, (small screwdriver)
- Inspect the plastic jet (like a volcano with a hole in it) pay particular attention to the tip - if it shows signs of deterioration or cracking, replace, remember - RED - low pressure feed, WHITE - high pressure - mains, BRASS - special applications - baine marie feeds etc. replace like for like - the size is based on the inlet pipe size 15mm/ 1/2" or 22mm / 3/4", etc, Most are 1/2".
- Reassemble, and move the arm to check its free. Replace on carrier, ( make sure the water level is low so your not fighting the action of the arm and risk cross threading it), now refill the tank, and check the level, (idealy minimum 75mm below water outlet), if its wrong, grasp the arm close to the valve and close to the ball and bend the arm a little, bend down to lower the level, bend up to increase it.
- Dont forget to make sure the split pin is split, or it will flood. Again, you can just change the body of this valve, most are interchangable. This valve can be done live, but I dont recommend it.
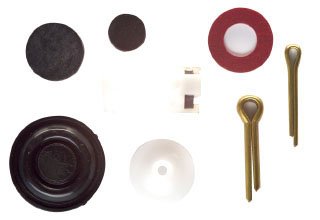
Items needed to Service a Standard Ball Valve |
|---|